
How Can Aluminum Eyelets Reduce Failures in High Use Products?
Article Summary
Aluminum eyelets are small components, but they often sit at the center of big problems: torn fabric, rust stains, sharp burrs, loose setting, cracked coatings, and inconsistent sizing that ruins an entire batch. This guide explains how to choose the right aluminum eyelets, which specs actually matter, how to prevent common installation failures, and what to ask a supplier to ensure stable, repeatable performance. You’ll also find selection checklists, comparison tables, and a troubleshooting section to help you fix issues fast—without guessing.
Table of Contents
- What aluminum eyelets do and where they work best
- Customer pain points and the real causes behind them
- Specifications that matter more than “size”
- Alloy, finish, and corrosion choices
- Aluminum vs brass vs stainless steel
- A practical selection checklist
- Installation best practices and common mistakes
- Quality checks that prevent batch failures
- Application notes by industry
- FAQ
Outline
- Understand the structure of aluminum eyelets and typical applications
- Map failures to root causes (material, finish, tooling, or process)
- Define specs and tolerances that match your fabric or substrate
- Select alloy and surface treatment based on environment
- Standardize installation to avoid cracking, pull-through, and deformation
- Build a simple incoming inspection plan to protect production
What Aluminum Eyelets Do and Where They Work Best
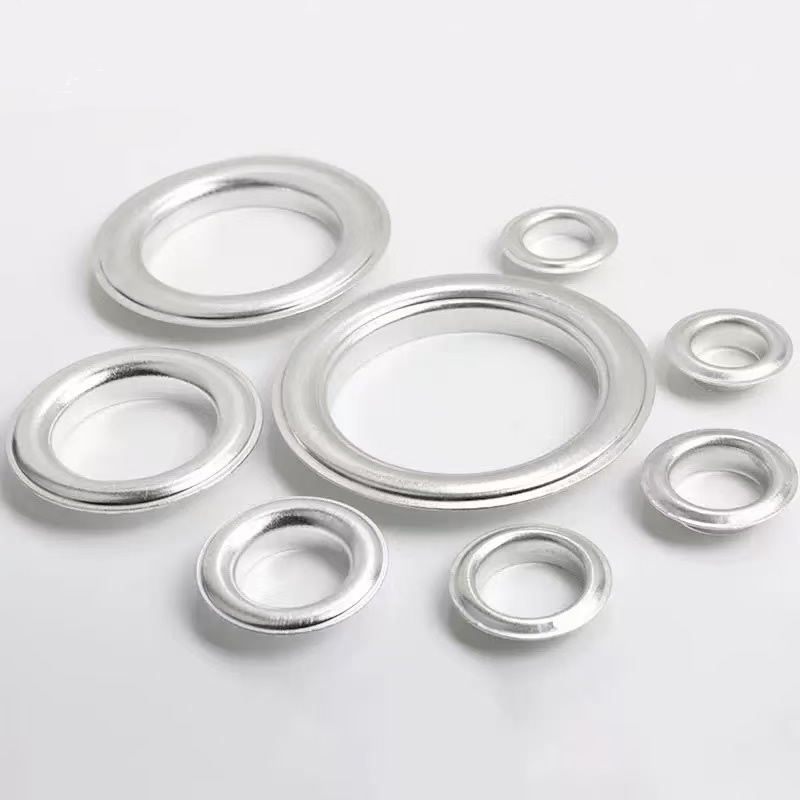
Aluminum eyelets reinforce holes in flexible or semi-flexible materials so the surrounding area doesn’t tear under tension, repeated movement, or abrasion. A typical eyelet includes a barrel (the tube that passes through the hole) and a flange (the rim that spreads load across the surface). When set correctly, aluminum eyelets distribute force, provide a smooth contact edge, and keep cords, hooks, or fasteners from cutting into the base material.
Aluminum eyelets are especially popular when you want a balance of light weight, good corrosion resistance, and clean appearance. They’re widely used in tarpaulins, banners, outdoor covers, backpacks, apparel, tents, curtains, shade sails, packaging, stationery, and a variety of industrial textiles.
Customer Pain Points and the Real Causes Behind Them
- Eyelets pull out or tear the fabric: Usually caused by the wrong flange diameter, too-short barrel length, weak substrate, or a hole that’s too large. Sometimes it’s also a setting die that over-compresses and cuts fibers.
- Sharp edges, burrs, or cracking after setting: Often traced to poor deburring, brittle plating, or incorrect die alignment. Over-pressing can split the rolled edge and create sharp lips.
- Corrosion spots or stains: This can happen in salt, humidity, or chemical exposure—especially when aluminum contacts a dissimilar metal (galvanic corrosion) or when the surface treatment is too thin.
- Inconsistent fit with cords, hooks, or grommet tools: “Same size” doesn’t always mean same tolerances. Inner diameter, barrel wall thickness, and flange profile must match your accessories and machines.
- Cosmetic defects: Scratches, color mismatch, and uneven anodizing frequently come from handling, racking methods, or unstable process control across batches.
- Production downtime: Eyelets that jam feeders, crack in press, or require rework can wipe out the savings you thought you gained from a lower unit price.
Specifications That Matter More Than “Size”
If you only specify “inner diameter,” you’re leaving room for surprises. For reliable performance, align these parameters with your fabric thickness, reinforcement method, and installation equipment.
| Specification | Why It Matters | What to Define |
|---|---|---|
| Inner diameter (ID) | Determines pass-through clearance for ropes, hooks, or screws | ID tolerance range and minimum clearance requirement |
| Barrel length | Must match material stack thickness to roll properly | Material thickness range and preferred set profile |
| Flange outer diameter | Spreads load and reduces pull-through | Minimum flange size based on tension and substrate strength |
| Wall thickness | Affects deformation behavior and crack risk during setting | Target thickness and acceptable variance |
| Edge condition | Prevents cutting fibers and improves safety | Deburr requirement and “no sharp edge” inspection method |
| Finish | Impacts corrosion resistance, color, and wear | Anodizing type, coating thickness, or conversion specs |
Alloy, Finish, and Corrosion Choices
Not all aluminum behaves the same in real-world use. A good supplier will help you select an alloy and finish that match your environment and installation process. If your product lives outdoors, near seawater, or in contact with chemicals, finish selection becomes more important than a small difference in price.
- Indoor decorative use: Standard aluminum eyelets with stable surface quality are often sufficient. Focus on appearance and burr-free edges, especially for consumer goods.
- Outdoor and marine-adjacent use: Prefer robust anodizing or well-controlled surface treatment. Also check accessory metals to reduce galvanic corrosion risk.
- High cycling or abrasion: Choose finishes that resist wear and avoid flaking. Make sure the rolled edge after setting stays smooth.
A practical tip: if your eyelet touches stainless hooks, steel rings, or copper-based components, consider isolation solutions (washers, coated intermediates, or material matching) to reduce galvanic effects in wet environments.
Aluminum vs Brass vs Stainless Steel
Customers often ask, “Which material is best?” The honest answer is: the best choice depends on weight limits, corrosion exposure, aesthetics, and how the part is installed.
| Material | Strength and Deformation | Corrosion Behavior | Typical Best Use |
|---|---|---|---|
| Aluminum | Lightweight, sets smoothly with correct tooling | Good general resistance, improved with proper finish | Tarps, banners, apparel, outdoor covers where weight matters |
| Brass | Good strength, stable forming | Generally good, but may tarnish | Fashion, leather goods, premium decorative hardware |
| Stainless steel | Very strong, can require higher setting force | Excellent in harsh environments | Marine gear, heavy-duty industrial uses, extreme humidity or salt |
A Practical Selection Checklist
Use this checklist to avoid the classic trap of “ordering by photo” and discovering incompatibilities at installation time.
- Define the material stack: fabric type, thickness, reinforcement layers, coatings, and whether heat sealing is used.
- Map the load: static tension, dynamic pulling, wind flutter, repeated lacing, or vibration.
- Choose flange size for your risk: larger flange for weaker fabric or higher pull-through risk.
- Match barrel length: ensure correct roll without crushing or leaving gaps.
- Confirm tooling: hand press, pneumatic press, automatic line, and die compatibility.
- Decide finish requirements: color, wear resistance, outdoor exposure, and stain tolerance.
- Set acceptance criteria: edge condition, color variance range, and dimensional tolerances.
- Request pilot samples: test set quality on your real material, not a substitute.
Installation Best Practices and Common Mistakes
Even premium aluminum eyelets can fail if the process is inconsistent. Most “eyelet problems” are actually tooling and setup problems.
- Hole sizing: Too large leads to wobble and pull-through; too small causes wrinkling, tearing, or improper roll. Use a consistent punch and verify hole diameter regularly.
- Die alignment: Misalignment is a silent killer. It creates uneven rolling, cracks, and sharp edges. Recheck alignment after any tool change.
- Press force control: Under-setting leaves loose eyelets; over-setting splits edges or crushes fabric. Standardize force or stroke.
- Material support: Soft textiles benefit from reinforcement patches or folded hems to distribute load.
- Operator consistency: Simple work instructions, go/no-go gauges, and periodic checks can stabilize output fast.
If you are scaling from hand-setting to an automatic line, plan a short process validation. The “same eyelet” can behave differently when cycle time, vibration, and feeding mechanics change.
Quality Checks That Prevent Batch Failures
A basic inspection plan saves money by catching problems before they hit your production floor. Here are practical checks most teams can implement without expensive equipment.
- Dimensional spot checks: ID, flange diameter, barrel length, and wall thickness from each carton or lot.
- Edge and burr inspection: Visual plus a light finger-safe check (with gloves) for sharpness and splits.
- Setting trial: Set a small sample on your actual material, then perform a pull test or stress test appropriate to your use case.
- Finish consistency: Compare color and surface defects under consistent lighting; track lot numbers for traceability.
- Packaging integrity: Poor packaging leads to scratches and dents, especially for anodized surfaces.
This is where a stable manufacturing partner matters. Nuote Metals Technology Co.,Ltd. supports aluminum eyelet projects with specification-driven production, sampling workflows, and batch control designed for repeatable installation and consistent appearance across orders.
Application Notes by Industry
- Banners and signage: Prioritize smooth edges and stable flange geometry to prevent tearing during wind flutter. Reinforced hems and correct spacing reduce stress concentration.
- Outdoor covers and tarpaulins: Focus on corrosion resistance and pull-through strength. Consider larger flanges and robust finishes if the product is exposed to rain, sun, and abrasion.
- Apparel and bags: Appearance consistency and comfort matter. Burr-free edges and stable anodizing help prevent snags and skin irritation while improving perceived quality.
- Industrial textiles: Match eyelets to fixtures and safety requirements. Dimensional tolerance and process consistency often matter more than decorative finish.
FAQ
Do aluminum eyelets work for outdoor products
Yes, as long as you choose an appropriate finish and design for the load. Outdoor failures usually come from insufficient flange support, incorrect barrel length, poor setting control, or corrosive exposure that wasn’t considered during selection.
How do I prevent aluminum eyelets from pulling out of fabric
Increase load distribution by choosing a larger flange, ensure the barrel length matches the material stack, tighten hole size control, and use reinforcement patches or hems when the substrate is thin or coated.
Why do some eyelets crack during installation
Cracking is often caused by over-pressing, misaligned dies, brittle surface treatment, or an alloy/temper that doesn’t tolerate your setting force. A short setting trial with adjusted press parameters usually identifies the cause quickly.
Can I match aluminum eyelets to specific colors
Many projects use anodizing or coating for color matching. For consistent results, define an acceptable color range, confirm lot control, and request pre-production samples under your lighting conditions.
What details should I send to a supplier to avoid mistakes
Send inner diameter, flange diameter, barrel length, your material thickness range, installation method, finish requirements, environment exposure, and a photo or drawing of the desired set profile. If possible, include a small material swatch for setting trials.
Final Thoughts
Aluminum eyelets look simple, but the difference between “works fine” and “constant returns” usually comes down to specification clarity, controlled tooling, and consistent batch quality. If you want aluminum eyelets that install cleanly, hold under real-world tension, and stay attractive over time, treat selection and process as a system—not a single part number.
If you’re developing a new product or troubleshooting a current issue, share your material thickness, target inner diameter, usage environment, and installation method. Nuote Metals Technology Co.,Ltd. can help you narrow the options, validate samples, and deliver stable production for your next order—contact us to get a quick recommendation and a tailored quote.
Send Inquiry


X
We use cookies to offer you a better browsing experience, analyze site traffic and personalize content. By using this site, you agree to our use of cookies.
Privacy Policy